This past weekend was demolition weekend, as you saw a preview of already. But of course, I wanted a few "staged" photos of us doing the demolition (you know, not looking super grubby with dust masks on!), so Friday evening after we picked up our new utility trailer, we took turns photographing each other taking inaugural swings at the shower tile.
Yes, I totally cheesed it up for these photos :)
But the next morning it was time to get down to business. We started by sealing off the doors to my husband's office and the other door off of the hallway that leads to the rest of the house (here's where you'll find the floor plan of our house if you're curious). We had also turned the air down really cold over night, so the house would stay cool when we turned the AC off before starting work that morning. Plus we blocked off the vents in the bathroom and laundry room, just to be safe. Taking precautions to avoid getting demolition dust and mold spores in the rest of the house was really important to us, especially since I have asthma.
First thing, we moved the toilet out to the garage, and plugged the hole so no sewer fumes would get out. The it was time for the old vanity to go. I'd mentioned that the vanity was moldy inside, since we had mold along the wall it was on. Well, here's the gross proof of the mold spots on the inside of the disassembled vanity and the underside of the counter. We'd briefly considered trying to Craigslist the counter, but decided it wasn't worth the effort once we saw it was moldy too.
And here's an even grosser look at the wall, with the vanity removed. This made us even more glad that we decided to do this renovation now, instead of waiting. And the money spent on our new vanity was well worth it!
Once the vanity and toilet were out of the way we got started on the tile removal. All we used were some hammers, wire cutters, buckets to collect the debris, a shop vac, dust pan and broom. And of course we wore dust masks, eye protection, and I wore a long sleeved shirt so my arms wouldn't get pelted with flying tile pieces. We were really lucky that our tile, and the concrete under it, broke up pretty easily with just hammering on it. I know I read a lot of instances where people had to tediously chisel each tile up, and I'm so glad things went quicker for us.
I started on the floor, working away from the shower (again, wanting to avoid tile flying at me) and my husband started on the shower.
We spent a few hours hammering away at tile, but then decided that we wanted to make a trip to the dump that afternoon, since they were closed on Sunday, so we switched gears to tackle the moldy drywall.
Sadly we didn't do much of the "just start swinging sledgehammers" like they do on HGTV. As fun as it would have been to just go crazy, we wanted to be careful about pipes and electrical wires, so instead we used heavy duty box cutters to cut squares out of the drywall, and then just started pulling chunks off with our hands. I did a couple of hammers through the wall, just for fun, but it was only after we'd opened it up nearby to make sure I wouldn't hit anything.
The good news is (and why I'm glad we didn't go gung-ho at destroying things) is that the upper half of the wall on the laundry room didn't have any mold on it, so we didn't need to tear that out.
Here's the laundry room wall before.
And after, looking into the bathroom through the bottom half that we removed. Yes, I'm cheesily posing with a hammer again. I also couldn't get MC Hammer songs out of my head, I wonder why!
Break it down. Stop. Hammer time!
Once we had all of the drywall pulled down (well, the moldy drywall, we didn't have time to get to the drywall above the shower), we made it to the dump with not much time to spare before they closed for the day.
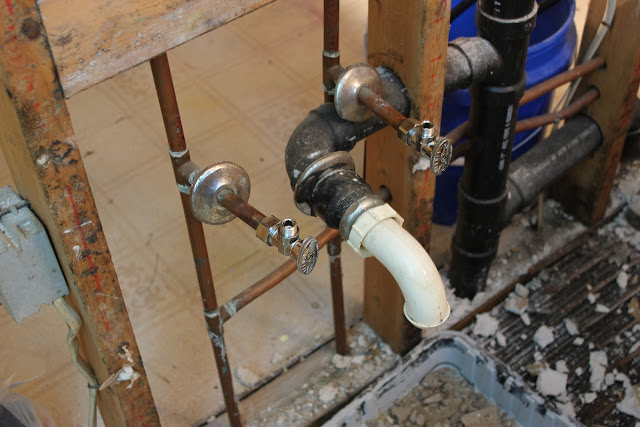
When we returned home, it was time to address the valves for the sink and washing machine. Since we're opening everything up, we're taking full advantage of the opportunity to replace all of the valves, and will be double checking all of the pipes before we put up the new drywall as well. I certainly don't want to have to deal with any leaks again in the future, so we're playing it safe and just replacing them now (and safe is especially good, since we now think that a leaking washing machine valve was the cause for a lot of this mold, since one of the two valves looked relatively new, so we know the previous owners must have replaced it at some point).
Here's my husband using his handy soldering tool to remove the old sink valves, after we turned off the water main (also note that he is an electro-mechanical engineer who solders electronics frequently, so we were confident in his ability to handle these minor plumbing things, with the help of some youtube videos...but if you don't have the skills, definitely call a plumber!).
And the shiny new sink valves in place. We used compression valves, so if we ever need to replace them again in the future, we won't have to deal with solder.
Unfortunately the washer valves weren't quite as easy to deal with, and involved two trips to the hardware store, after damaging the (poorly designed) first set of valves. So getting the valves done was as far as we got Saturday night.
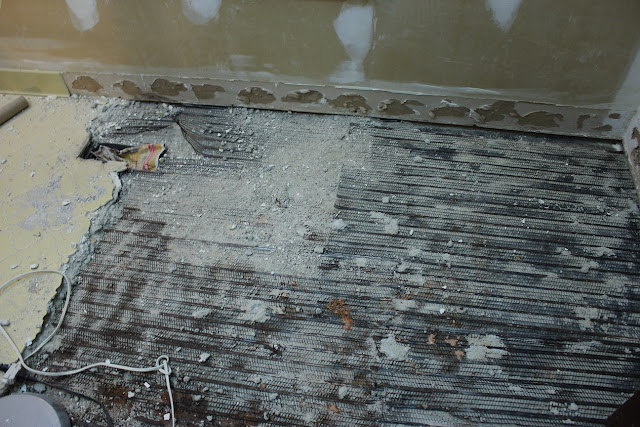
Bright and early Sunday morning though, it was back to tile smashing and removal. Here are a couple of progress shots.
Somehow, these are the last of the photos I have from our Sunday, but that's ok (well, kind of) because we have some more demolition in our future. That's because next to the tub we found some damaged sub floor, so we're going to have to remove it and install new sub floor this weekend, before we can move forward with putting up drywall. So I'll be sure to snap a true "completely demolished" bathroom shot then. But it's alright, after reading up, it sounds like it's actually pretty common to find damaged sub floor during these bathroom guts, and it isn't all that difficult to replace, or that expensive. Our floor joists are still in good shape from what it looks like from the crawlspace, which is the important thing, and we're going to treat them with a fungicide borate that kills mold and dry rot, just to be safe. It's probably overkill, but we want to do things right, and only have to do them once!
So this weekend will be sub floor removal and replacement, and then, maybe we'll get to hanging drywall. Maybe. But if we fall behind our schedule a little, that's fine by me, if it means we'll have strong, sturdy new sub floors to put tile over. And such is the nature of DIY home renovations, something is always going to come up and things are always going to take longer than you think! But at least we have less drywall to replace than we thought we would.
Yep, I'm good at finding the silver lining in all of this. You kind of have to be to keep rolling on. Plus, I figure that the obstacles will just make the end result, a gorgeous new bathroom, all that more rewarding, right?


16 comments:
I am so impressed! I can't wait to see the finished product. :)
That mold was not pretty - what a great thing that you caught it!
Great progress so far! And yes, I'm glad you are doing this now and getting those gross-moldy walls out ASAP, especially if you are an asthma sufferer! Can't wait to see the next installment, and eventually the final results!
It makes my stomach churn to read about this because we JUST went through soo many of the same problems! You'll make it through and be so very happy proud.
That's crazy how much mold was there. Good thing you took care of it now. I love reading about your renovations too- I'm inspired for when we finally get a house!
You guys are rock stars! I would never take on something like this in a million years. Way to go on the progress you're making!
Dang girl! You guys are getting busy on that bathroom!
are you guys using drywall behind the shower or cement board? i'm a renter, so i never get to do demo/reno, but on one of the other diy blogs (maybe amanda's love & renovations) they replaced moldy drywall with cement board, which is supposed to hold up better with the constant water influx. i don't know how much of a difference it makes, but if you're going through all the work, is this a better option than drywall?
Oh yes, we are 100% using cement board behind the shower tiles, and on the floor. You definitely should not use regular drywall in a shower surround, or really anywhere that is going to be exposed to water. We are, however, using regular drywall on the wall where the vanity goes, since no tile will be on that section, and in the laundry room. Luckily we only have to replace the drywall on the bottom half of the laundry room though, since we'd originally thought we would have to replace the entire wall in there!
wow, that is a lot of demo! good luck with the work that needs to be done this weekend!
Wow wow wooooooooooow. You guys are doing awesome! You've definitely got some balls to take this on. I can only imagine how much work this is. But I'm sure you're going to have a beautiful end product!
Oh my goodness. I am seriously in awe!!! Great job dominating that room. If we ever buy another house I am hiring you guys to work on it.
Thanks for sharing these ideas about using marble in interior design.
home renovation Ireland
kitchen renovation Dublin
bathroom renovation contractors Ireland
house renovation services
renovation ideas for Irish homes
eco-friendly renovation Ireland
old house renovation Dublin
renovation cost estimator Ireland
modern home renovation trends
renovation contractors near me Ireland
Thanks for sharing these ideas about using marble in interior design. home renovation Switzerland
kitchen renovation Zurich
luxury villa renovation
bathroom remodeling Geneva
Swiss renovation experts
energy-efficient renovatio
The visuals were very effective. Another helpful link I found on estimating drywall work gives more detail.
This renovation post feels like a candid journal entry—messy beginnings, small wins, and the excitement of creating something better. It’s a reminder that thoughtful makeovers, even in functional spaces, make a big difference. I see the same transformation in garages handled by Manmachine Automotive, one of the best garage makeover companies in India, known for their durable garage flooring and detailing lights that bring order and purpose to the space.
Post a Comment
I would love to hear from you!