This was a fun little project that I decided to do as soon as my husband bought me my new camera: to take pictures all the way along our cross country drive to North Carolina and turn them into a timelapse video.
There were a few hiccups along the way, but it turned out to be a pretty easy concept to put together once it was all said and done. But before I show you the videos, let me explain how we set this all up.
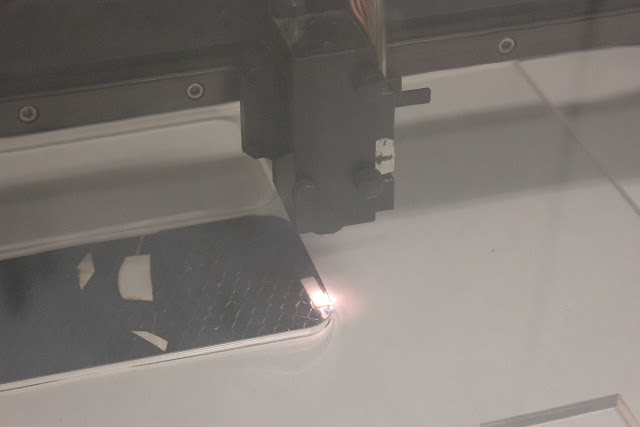
First, we needed to figure out a way to mount my camera to the dashboard of my husband's car that we drove on our road trip. The way we came up with involved using two pieces of laser-cut acrylic, one with a hole cut all the way through the center, and the second with a bigger hole. We glued the two pieces of acrylic together and then glued some rubber drawer liner material to it, to cushion the camera and prevent slipping on the dashboard. To attach the camera to the acrylic base, we just screwed a screw through the bottom of the acrylic into where you normally attach a tripod (the smaller hole in the acrylic fit the screw perfectly, and the bigger hole in the second piece allowed the screw to fit into the acrylic, so it was flat and flush on the bottom side of the mount).
Laser cutting the acrylic:
Mounting the camera to the base:
We also made a frame piece of acrylic that this base fit perfectly into, which we could attach to the dashboard. This made it easy to remove the camera and base every night when we went into the hotels.
Here's a close up of the frame and the base sitting in the frame. We used strands of velcro run under the ends of the frame and secured it up over the top of the acrylic base, securing the camera in place, but still allowing easy removal (since I was too paranoid to leave the camera out in view when we left the car).
With a few accessories, we were ready to rock! The essential add ons I used included a power adapter for the camera, so I didn't have to worry about changing out the battery throughout the day, a cigarette lighter power adapter to plug the camera into (also worked great for charging my laptop while I got some work done in the car), and a shutter remote control timer. This shutter timer was the most important part of the whole set up, because it allowed me to program the camera to take a photo exactly every 30 seconds. No way would I have wanted to manually do that the whole 4 day drive!
Here's the camera all hooked up to the accessories, in action (you can see the strands of velcro in this picture, although it's crappy quality because I took it with my cell phone):
Now, as far as actually making the timelapse videos (I made one for each day of our drive, to keep them shorter), that was really easy. I just used Windows Live Movie Maker, which I think comes standard on most PCs.
I simply opened the program, drag and dropped all of the photos and the title photo into the right side of the program, and played around with the length of time to display each picture. I picked 15 seconds, which was just long enough to see the photo, but still make it more video-like, rather than a photo slideshow.
Then, to add music to the videos I just inserted some road trip songs from my desktop, saved the videos, and I was done!
So now you probably want to see the cross country timelaps videos, huh? Well too bad, because that is going to have to wait for tomorrow's post! I'm patiently waiting for my videos to upload as I write this, so y'all are going to have to be patient too!
Have you ever played around with timelapse photography, or used Windows Movie Maker?


8 comments:
Such a cool idea! Patience is not my strong suit - can't wait to see the finished product!
That's awesome! Can't wait to see them!
Wow, I would never have thought to make a dash mount! Can't wait to see how it turned out.
What a great idea! And I love Windows Movie Maker...I used it to put together my wedding reception slideshow and I just did a time lapse video of my weekly pregnancy photos. It's a fun way to waste time at work. Did I say that? Um, I meant at home.
Such a fab idea; it will be great to look back on.
Looking forward to seeing the video's.
I'm so glad you did this tutorial. I just came back to it b/c I want to put together a time lapse video for a post I'm working on. I didn't have this on my computer so, I Googled it and found it's a free download. Score.
Such a fab idea; it will be great to look back on.
Looking forward to seeing the video's.
Such a cool idea! Patience is not my strong suit - can't wait to see the finished product!
Post a Comment
I would love to hear from you!