The bride was chatting with her bridesmaids, as her stylist proceeded to spiral curl the bride's whole head of hair. Then the stylist pulled it all to the side and turned it into a side chignon/curly bun.
Maybe I'm missing something, because I'm pretty sure I've seen it done this way before. But why the heck spend all the time curling all of your hair, when not all of it needs to be curled?
I wear my hair in a curly side chignon somewhat frequently, and I've never, ever curled my entire head of hair to do it! So maybe not everyone knows the shortcut? Because this really is a pretty easy hairstyle to do, if you're not wasting time curling your hair for an hour.
So, because I love making tutorials, I'm going to share my curly side chignon shortcut! (Side note: how can I get a job that lets me make tutorials and travel plan all day?)
What you need is a good curling iron (I use this one), a large hair claw, hair rubber band, and a bunch of bobby pins.
(please ignore the black smudges on the barrel, that's from using my curling iron to heat up my eyelash curler!)
(except I used about double the number of bobby pins)
Start with your hair dry and down.
Then section off the top layer of your hair (you can see below how much I grab, but if you have thinner hair you might want to section off the top two layers of your hair instead).
Twist it on top of your head.
And use the claw to clip it out of the way.
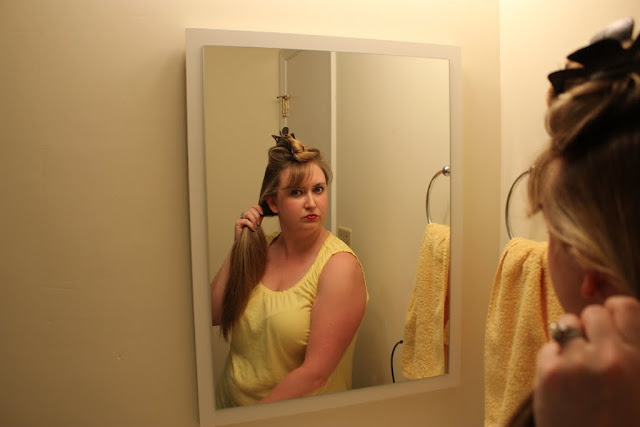
Then, grab the hair you left down, pull it to the side, and make a side ponytail.
Twist the hair coming out of your ponytail.
Then wrap it around the hair rubber band to form a bun. Pin it into place with 3-4 bobby pins.
See? Look at all that hair you now don't have to bother curling! It's going to be hidden no matter what, curled or not, because you're going to cover it with the hair you sectioned off on top of your head.
So now, take down your top layer of hair.
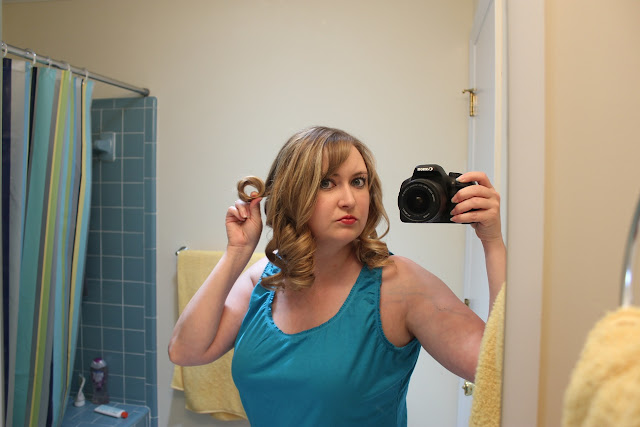
And then curl just your top layer. I like to do every other strand the opposite direction, and I always start with the iron at the top, twirling it until it's completely wrapped to the base of your hair, hold for a few seconds, and release.
Curl around your head until all of the top layer is curled. These don't have to be neat or tight curls at all. The curl is just a guide for the next step, meaning it makes things easier, but isn't even 100% necessary.
Now, starting with the curls closest to the bun you made earlier, roll the curl up from the bottom, and bobby pin it to your bun.

Notice that I'm pinning the curls sort of flat against the bun, so you can see the spiral of the rolled curl facing out. I also pin the curls a different way sometimes too, which I'll show later in this post. Just play around with how you like your curls to look though, either way works!
You can use a hand mirror between pinning curls to figure out where you want your next one to go, but since it's a little of a messy look you're going for, nothing has to be exact.
I like to pin my curls from the bun, working my way out towards the front of my head in either direction. This helps balance out your placement of rolled curls.
Once I get to the curls on the far side of my head, I like to first pin the strand of hair next to the bun, then roll the curl and pin it. See the strand on my back below...
Pull it over and pin it in place, for a cleaner look before you roll and pin the curl.
Keep rolling and pinning until you run out of hair to pin, and you're probably done! Hopefully you've spread out the pinned curls enough to cover the bun (or at least covered most of it so you can't tell it's a bun anymore). You can also finger comb your hair down in the back and pin it down into the top of the bun if you want a smoother look. I like the messy look though, so usually don't bother. Add hairspray, and you're done.

A couple of closer shots of the pinned curls.
So that's one way to pin the curls, here's the other way I sometimes do it.
This time I experimented with hot rollers, but it's the same idea. I pulled my under layer of hair into a side bun, then hot rolled the top.
Take out the rollers after 20 minutes or so, and you're ready to start rolling curls.
For these, I stretched out the curled strand of hair first, then rolled it from the bottom.
Once I get near the top of the bun, I flip the roll over, and pin it so the roll is coming over the top of the strand of hair, and I pin the side of the curl, so it's standing out from the bun (as opposed to the last time, where I pinned the curls flat against the bun).
Same as before, keep rolling and pinning the curls out from the bun, until you've covered it all with curls. And that's it!
Pinning the curls out from the bun, instead of flat to the bun just creates a different look, depending on which you prefer. It's a little more polished this way, in my opinion, but still has the messy/casual vibe I always go for with a curly side chignon.
So there you have it. And now that you know this little bun-making shortcut, you can do this hairstyle yourself in a whole lot less time, no need to curl all of your hair first!


18 comments:
Thanks for sharing this! I love that look and I've always wondered why people curled all of the hair, it didn't seem necessary! I can't wait until my hair is long enough to try this! :)
So cute and easy!! Why is it that I've been paying people for a side bun lately? Thanks for all the tips!
So cute! You need to move back here and teach me how to do my hair - though I'm warning you that I have about 1/100th of your hair, so it will be a challenge ;) Thanks for the awesome tutorials! I still need to spend some time figuring out how to curl my hair!
You are my girly inspiration. I need you to teach me how to make my hair look like yours all the time. Love when you do tutorials!
Super cute! Thanks for sharing. My hair is still too short for this :(
I love this style, and how awesome that there's a shortcut! I'd love to give this a try.
Oh my god, you are SO good at this. I bow down to your hair knowledge. One of my goals is to learn how to do a hairstyle that isn't "up" or "down." I've always wanted to try a side chignon and this looks like I might actually be able to do it...if I can muster the patience with the bobby pins.
Love the trick! And seriously... that purple dress is awesome on you.
Your hair skills are so impressive, I'd like to try this! My question is this: Every time I use a curling iron, I can never release it without basically unrolling the curl I've just made...How do you do it so that you release it and keep the curl??
Hi Mara!
Ok, first tip, if your curl is coming out that easily, you might want to leave the curling iron in place a little longer, it shouldn't come all the way out even if you're unraveling it, if it's curled enough to start with. Once I have left the strand of hair in the curling iron long enough, I open up the "arm" of the curling iron and then I gently and slowly pull the curling iron straight down. This should make the curling iron slip down and out of the curl, leaving the curl in the spiral shape. If the iron doesn't pull right out of the curl, try opening and closing the arm of the curling iron several times, at the same time you're pulling the iron downwards.
Another thing that might help is to lightly spritz your strand of hair with hairspray before you put the curling iron on it. This can help the curl stay more structured when you take the curling iron out. If you do this though, just make sure you only use a little hairspray, because if you use too much your hair can stick to the curling iron, which will make it harder to pull the iron out and leave the curl intact.
Hope that makes sense, but let me know if it doesn't!
SUPER cute!
wow - I never thought to only curl the part that shows, not your entire head of hair! Seems so simple, now that I think about it - but I never would have thought to do it that way before! Great tutorial. :)
i love your tutorials, so fun!
You are so lucky that you're able to do so many different things wit your hair (as I cannot...).
And I actually know the reason why the stylist was curling the bride's entire head, most likely. When you have fine/thin hair like I do, in order to create volume you have to curl/tease. Even though my wedding day hairstyle was in no way curly (I had a low side chignon), we had to put my hair in hot rollers for a long time to give my hair the body that it lacks naturally. If we hadn't done that, my hair would have essentially been a slicked side ponytail (haha, my ponytail is about the diameter of a quarter, if that)!
Wow, tried this last night and I just do not have the ability to do this with my hair - epic fail!
Oh no! Well, it might take a little practice if you've never done it before.
Another way I've done the curls that might be easier is I start with my hair damp, and just twist the sections of hair around my finger to create the curl before pinning it in place. It gives you a little bit smaller/tighter curls, but the wetness helps the strand of hair hold together better while you're creating the rolled curl, and you don't have to be as precise, because you're just using your finger as the guide. Good luck!
OMG am sooo looking forward to this hairdo tutorial since I plan to do it next week for a big gala dinner... I found this kind of hairdo is now very common in red carpet and I find it chic without looking too much efforts ^_^ thank you!!!
It's appropriate time to make a few plans for the longer term and it is time to be happy. I've
learn this post and if I could I wish to recommend you some attention-grabbing things or tips.
Perhaps you can write next articles relating to this article.
I want to read more things approximately it!
My weblog ... similar webpage []
Post a Comment
I would love to hear from you!